Configuration
Importing data from Microsoft Entra ID (formerly “Azure AD”) requires the following information:
Table: Microsoft Entra ID Connector Settings
Access Credentials
The Qbilon Microsoft Entra ID connector uses authentication via Client ID, Client Secret and Tenant ID.- Create a new application in the Microsoft Entra ID in “App registration”.
- Create a new “Client secret” value with a description under the “Certificates & secrets” item. The temporarily visible “Value” is the client secret that is needed for authentication.
- In “Overview” you will find the Application (client) ID as well as the Directory (tenant) ID that must be specified for authentication using the API.
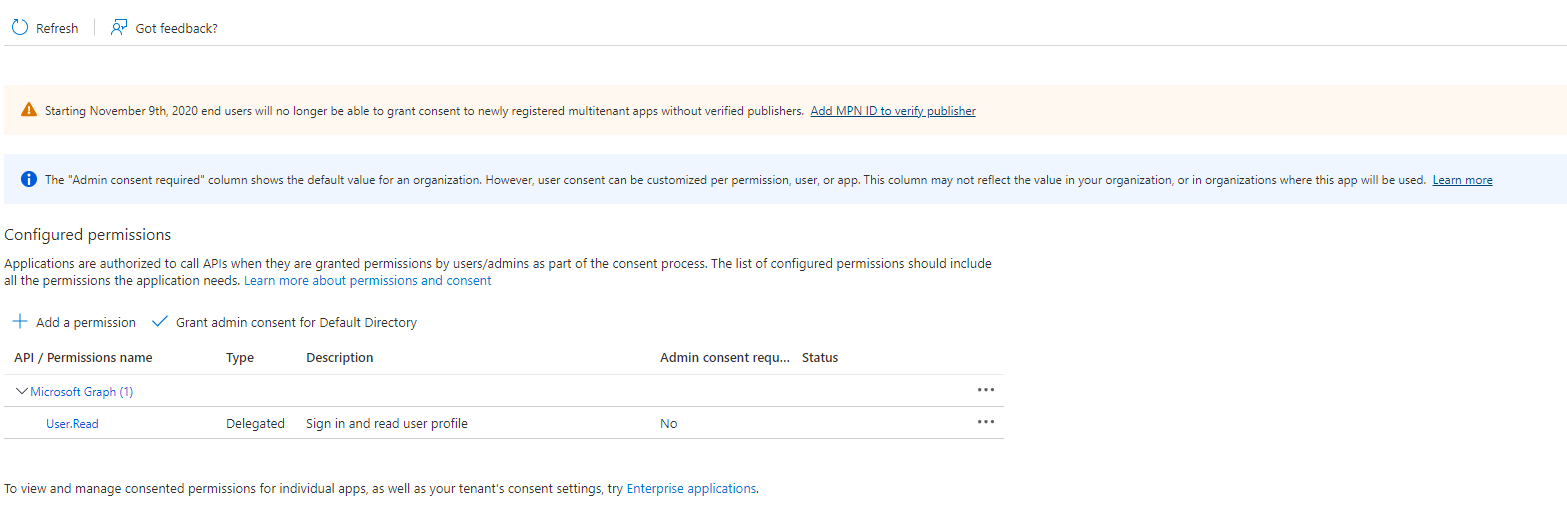
- Due to increased requirements, further API permissions must be assigned for the application:
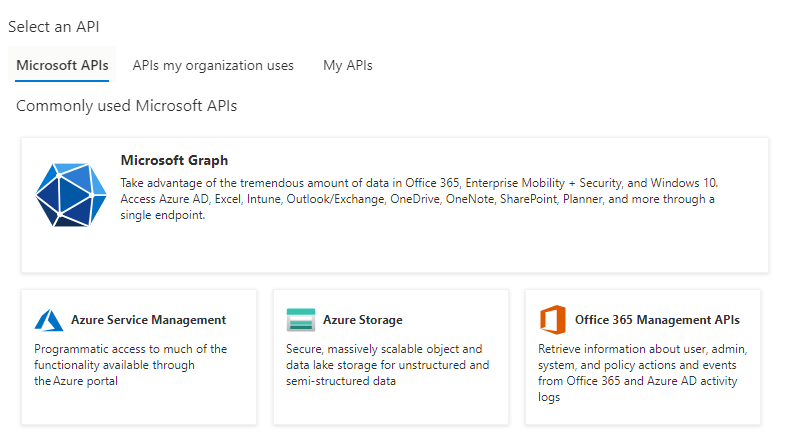
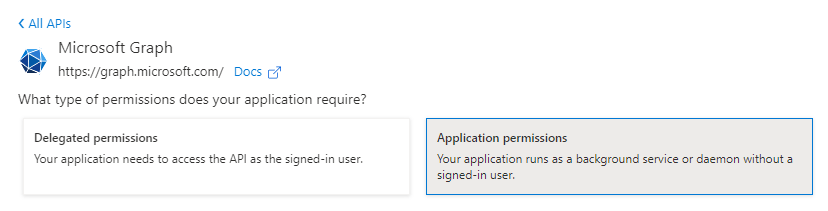
- Add a new permission by clicking on ”+ Add a permission” and select Microsoft Graph (Figures 1 and 2). Furthermore, application permissions must be granted (Figure 3).
- Read permission for the following types have to be set (read-only, your data is not altered):
- User.Read.All
- AdministrativeUnit.Read.All
- Group.Read.All
- Application.Read.All
- GroupMember.Read.All
- Organization.Read.All
- Directory.Read.All